
An HVAC system relies on properly functioning ductwork to deliver consistent airflow and temperature control throughout your home. HVAC ductwork repair in Las Vegas is more complex than it may seem at first glance. Many homeowners misjudge the work involved in identifying and fixing duct problems. Over time, ducts can become corroded, leaky, or misaligned, disrupting your system’s overall performance. Poor duct conditions reduce energy efficiency and lead to rising utility bills. Repairing these problems requires specialized tools, accurate diagnostics, and a solid understanding of HVAC airflow. DIY efforts often result in mistakes that compromise home comfort.
Las Vegas homes, especially older ones, may conceal duct issues behind walls or in tight crawlspaces. Performing HVAC ductwork repair demands patience, technical skill, and a detailed plan. Missteps like loose joints or improper sealing can create major air leaks. These errors make your HVAC system work harder, increasing wear and reducing efficiency. Homeowners should carefully evaluate whether they’re prepared for such a demanding task. What appears simple at first often reveals deeper complications during the repair process. It’s important to consider the risks before starting duct repairs without professional guidance.
Should You Attempt HVAC Duct Repairs Yourself?
DIY ductwork repair might sound appealing, but it carries serious risks if done incorrectly. Your HVAC ductwork is vital to system performance and indoor comfort. Improperly repaired ducts can reduce airflow, increase noise, and inflate energy costs. Precision and expertise are required for each component, sealing, spacing, and insulating. Even minor mistakes can lead to costly consequences.
Repairing HVAC ducts in Las Vegas requires a detailed approach and the right tools. Poor support can lead to sagging and eventual collapse. Incorrect layout spacing disrupts your system’s airflow patterns. Faulty sealing allows heated or cooled air to escape, undermining efficiency. Even insulation plays a key role in preventing temperature loss and condensation. If any of these areas are neglected, repair efforts may cause more harm than good. While some tasks are DIY-friendly, HVAC duct repair is often best left to professional technicians for long-term results.
Core Steps for Performing HVAC Duct Repairs
HVAC duct repairs require a step-by-step approach for safety, airflow, and long-term efficiency. Each action must be carefully executed. Homeowners in Las Vegas should understand these foundational steps before attempting any repairs themselves. Skipping one stage or rushing through it could undermine the whole system’s function. It’s essential to begin with inspection and move methodically through layout, materials, removal, and fabrication. These steps help avoid major problems in the future and support strong, consistent airflow.
Most HVAC systems are hidden behind walls or ceilings, making precision even more important. URBN emphasizes these core tasks to ensure all ductwork is sealed, routed, and reinforced properly. This reduces future service calls and keeps energy bills manageable. Whether you’re attempting minor DIY repairs or preparing for professional service, knowing these key steps is critical. A well-planned process leads to better comfort and more efficient HVAC performance.
Inspect Existing Ductwork Thoroughly
Before repairs begin, a full duct inspection ensures your duct system is ready for accurate and efficient upgrades. Skipping this step leads to oversights. Many hidden issues go undetected without a deliberate review. Thorough evaluation sets the foundation for a successful repair project.
- Look for rust, holes, disconnected joints, and visible damage throughout the system.
- Use smoke pencils or infrared tools to detect hidden air leaks.
- Measure airflow at each vent to identify weak or blocked areas.
- Examine duct size and route to assess if they meet system needs.
- Check for signs of mold, pests, or excessive dust inside ducts.
A detailed inspection reveals whether the problem is structural, flow-related, or insulation-based. It helps technicians decide what to repair or replace. If ducts are accessible, this step can be quick yet incredibly valuable. Make note of areas needing extra support or resealing. Identify blockages or collapsed sections affecting airflow.
Starting with a precise inspection avoids missteps during later phases. With a well-mapped duct condition, each repair becomes more effective. This clarity leads to better decisions and improved comfort throughout your Las Vegas home.
Redesign the Duct Layout if Needed
Some duct layouts limit airflow or overwork your HVAC system. Redesigning the layout can improve comfort and energy efficiency. A better layout delivers even airflow to each room. You may need to reroute ducts or add new returns.
- Check if ducts are too long, narrow, or full of sharp turns.
- Confirm duct sizes align with HVAC system capacity and room requirements.
- Identify unnecessary bends and loops that slow down airflow.
- Add returns or adjust supply vents for more balanced air distribution.
- Consider zoning for multi-level or large homes to improve temperature control.
An outdated or poorly designed system creates uneven heating and cooling. Rooms may stay stuffy or cold, even with a working HVAC unit. Redesigning ensures each space gets the air it needs without wasting energy. If your layout causes excessive pressure or noise, it likely needs an update. Modern duct configurations reduce strain on your HVAC equipment.
It also makes future maintenance easier and more effective. This step is worth the effort to fix performance issues that won’t go away with simple repairs. Think of layout redesign as investing in lasting comfort and consistent system output.
Choose Materials That Support Durability and Efficiency
Using the right materials is key to a durable and energy-efficient duct repair. Not all duct products perform the same. Material choice impacts how well your HVAC system holds airflow and resists outside conditions. Choose materials built to last in Las Vegas conditions.
- Select galvanized steel or thick flexible duct for durability.
- Pick UL-listed insulation to meet fire and safety standards.
- Use vapor barriers to block moisture and reduce condensation.
- Consider duct liners that dampen noise and protect airflow.
- Avoid outdated or cheap materials prone to rust or mold.
Durable materials help prevent sagging, cracking, and energy loss. This keeps the system reliable for many years. Proper materials also improve indoor air quality by resisting mold and dust buildup. Make sure every component, duct walls, connectors, and insulation, meets current performance standards.
In Las Vegas, materials must handle heat, dry air, and attic temperature swings. Quality choices during repairs mean fewer call-backs and better system performance. You’ll enjoy quieter operation and better airflow when you build with efficiency in mind. Material selection isn’t the flashiest step, but it can be the most impactful long term.
Remove Damaged Ducts Carefully
Removing damaged ducts may seem simple, but it requires patience and precision to avoid unnecessary damage or contamination. Ducts often run through tight, hidden spaces. Removal must be controlled to protect your home and HVAC system.
- Cut only the damaged sections using the correct tools.
- Avoid nearby electrical wiring, plumbing, or structural supports.
- Clean up debris immediately to reduce airborne contaminants.
- Remove fasteners and hangers without stressing nearby structures.
- Label old duct paths to match new installation routes more easily.
Hasty removal can break other parts or leave dangerous debris behind. Leaking dust, insulation, or mold can impact your indoor air. Treat removal as the first real step in successful duct replacement. Make note of every removed section to guide your next steps. This process helps plan where new ductwork should run and where insulation is needed.
It’s especially important in older Las Vegas homes with aging systems. Safe removal helps keep your HVAC system stable during repairs. It also prevents problems that arise from leftover contaminants or loose material. Handle each piece of duct with care and attention to avoid new issues.
Customize and Fabricate New Duct Sections
When ducts need replacement, pre-made parts rarely offer a perfect fit. Custom fabrication ensures the new sections work seamlessly with your home. Each piece must be measured, cut, and shaped to preserve efficiency and airflow.
- Measure existing spaces to determine duct size and direction.
- Cut sheet metal or flexible duct material to precise dimensions.
- Use bending tools for accurate angles and smooth transitions.
- Test-fit sections before final sealing to ensure alignment.
- Seal raw edges to prevent airflow loss or physical damage.
Custom duct fabrication minimizes bends, blockages, and excess pressure. That improves airflow and system life. Each fabricated section supports better ventilation and easier maintenance in the future. Take your time when sizing and cutting to avoid rework. Misfit pieces cause inefficiency and energy waste. You can’t rely on generic parts when ducts travel through narrow walls or ceilings.
Custom work guarantees that airflow matches your home’s unique needs. This step may require professional tools or sheet metal knowledge. When done right, fabrication supports maximum HVAC performance and long-term reliability. Fit each duct precisely so the entire system functions smoothly without obstruction.

Final Phases of a Complete HVAC Duct Repair
Once the core steps are completed, the duct repair process must be finished with precision and testing. These final phases are crucial. They ensure that your HVAC system performs efficiently and safely across your Las Vegas home. Many homeowners overlook these steps, but they are essential for long-term system stability. If skipped or poorly done, even a well-installed duct system may underperform. Final sealing, testing, and inspection are not optional, they’re vital to overall HVAC performance.
URBN ensures these final stages are performed with care and attention to detail. Sealing joints, insulating, and testing for efficiency are critical to getting the most from your HVAC. Even airflow distribution and leak-free performance depend on accurate execution of these tasks. These finishing touches help prevent future issues and ensure energy savings. For a durable HVAC system, always follow through with these final phases of duct repair before declaring the job done.
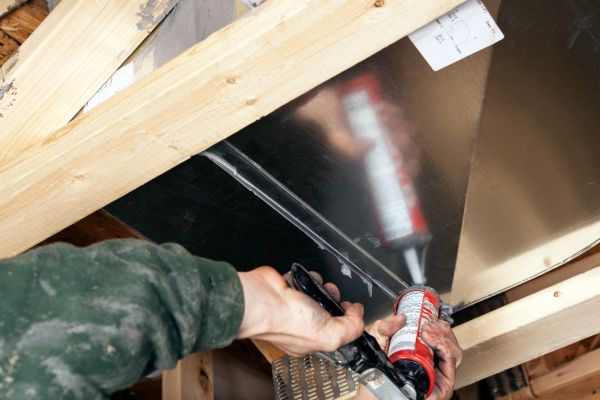
Connect and Seal Each Joint Properly
Sealing and connecting duct joints properly is essential for maintaining pressure and airflow throughout your HVAC system. Loose connections often lead to leaks that waste energy and reduce overall system efficiency. Each joint must be fastened and sealed with durable materials to prevent future problems.
- Apply mastic sealant, not just standard duct tape, for a long-lasting seal.
- Use sheet metal screws to fasten joints securely.
- Seal all duct seams, including elbows and hidden corners.
- Allow time for sealant to cure completely before testing airflow.
- Inspect sealed joints after system startup to catch minor leaks early.
Proper sealing also blocks dust, allergens, and pollutants from entering the duct system. This improves your home’s air quality. When skipped, poor sealing causes air loss, temperature imbalances, and higher energy bills. Take the time to get this step right. Even small leaks can undermine the entire ductwork repair. Use quality materials and proven techniques to secure your duct connections.
Inspect the sealed sections regularly during system operation. Strong joints help extend the life of the entire HVAC system. Connect and seal each joint with care for better long-term performance and lower operating costs in Las Vegas homes.
Apply Insulation to Control Energy Loss
Insulating ductwork is critical for reducing temperature loss and improving HVAC efficiency, especially in hot or unconditioned spaces. Without insulation, air loses its temperature while traveling through the ducts, causing discomfort and wasted energy. Proper insulation prevents this issue and boosts performance.
- Choose insulation with a high R-value, like R-8, for better efficiency.
- Wrap all duct surfaces without leaving any exposed areas.
- Use vapor barriers to block condensation and moisture.
- Tape insulation seams tightly to avoid gaps.
- Avoid compressing insulation, which reduces its thermal resistance.
Insulated ducts maintain temperature from the air handler to the vents. This helps your HVAC system work less and last longer. In Las Vegas, insulation also protects ducts from extreme attic heat. It reduces the chance of condensation buildup that leads to mold or corrosion. Skipping insulation causes inconsistent room temperatures and more energy use. A properly insulated duct system supports lower utility bills year-round.
Always inspect insulation after installation to ensure complete coverage. Consistent insulation results in more even air distribution and increased comfort. It’s a simple step that delivers long-term savings and performance. Make sure your ducts are fully insulated for best results.
Balance the System After Repairs
Balancing your HVAC system ensures air flows evenly to every room after duct repairs are complete. Without balancing, some rooms stay too hot or too cold. This step corrects airflow issues and helps reduce energy use by making your system run efficiently.
- Measure airflow from each vent using a calibrated flow hood.
- Adjust dampers to increase or decrease airflow where needed.
- Check that all rooms receive the right amount of air.
- Identify weak or noisy airflow zones and address them.
- Recheck flow after damper adjustments to confirm effectiveness.
System balancing improves comfort and helps maintain stable temperatures throughout your home. It also reduces wear on HVAC components. Imbalances force the system to work harder, shortening its lifespan. Las Vegas homes often face uneven airflow due to aging ductwork or poor layout. Balancing solves those problems. Use professional tools or hire a technician to handle this task.
A properly balanced system helps prevent future duct issues. It also boosts efficiency and comfort in every room. If you want lasting results after duct repairs, don’t skip this important final step. Balance makes all the difference in airflow performance.
Perform Leak and Efficiency Tests
After sealing and balancing, your HVAC system must be tested to confirm there are no remaining leaks or inefficiencies. These tests verify that your duct repair efforts worked and the system performs at its full potential. Without testing, costly leaks may remain unnoticed.
- Use a blower door test to measure duct tightness and airflow loss.
- Employ manometers to check pressure differences within the duct system.
- Listen for unusual sounds that may indicate hidden airflow restrictions.
- Track utility usage before and after repairs to compare efficiency.
- Inspect insulation for heat retention during system operation.
Leak testing ensures every joint is sealed and energy is not wasted. Performance testing reveals if airflow is balanced and efficient. These tests protect your investment in repairs. In Las Vegas, heat increases energy demands, making efficiency testing even more valuable. Without it, your HVAC may lose air, waste energy, and underperform.
Always follow sealing with leak tests for the best results. Confirm every change improved the system’s function. Professional testing offers data-driven insight into how well your ductwork performs. Make these evaluations part of your standard repair process for smarter energy use and lasting comfort.
Complete a Final System Check
The final system check confirms that every part of your duct repair was done correctly and functions as intended. This last step ensures your HVAC system is reliable, safe, and efficient for long-term operation. Even small oversights can cause future problems.service
- Reinspect all duct joints and hangers to confirm proper installation.
- Check that airflow and temperatures are consistent in each room.
- Confirm insulation is secure and not compressed.
- Ensure ducts are accessible for future service and maintenance.
- Test system startup and shutdown to confirm smooth operation.
A comprehensive final review catches issues before they affect performance. It gives you confidence in your duct repair results. In Las Vegas, where HVAC systems work hard, this step matters more. Confirming airflow, insulation, and accessibility now saves time and money later. Documenting the repair work also helps with future servicing.
This review wraps up the repair process professionally. Take your time during this stage to verify every part works right. The final check turns a good repair into a complete success. Always finish your duct repair with a full system inspection to ensure peace of mind.
Conclusion
Repairing HVAC ductwork can be far more difficult than most homeowners expect. Hidden damage, poor layout, or improper materials all complicate repairs. Every step, from inspection to testing, requires precision and experience. In Las Vegas homes, ductwork often runs through attics, walls, and tight spaces. These conditions make repairs even more challenging. One wrong move can reduce system efficiency and lead to air leaks or uneven airflow. That’s why careful planning and quality workmanship are essential.
URBN HVAC Services specializes in expert ductwork repair for Las Vegas homeowners. Their team uses advanced tools and proven methods to restore airflow and efficiency. From sealing joints to balancing airflow, they complete each step with care and attention. Choosing professionals like URBN ensures safe, long-lasting results. Don’t let ductwork issues drive up your energy bills or ruin indoor comfort. Call URBN today to schedule your HVAC duct repair and restore your system’s performance.
FAQs
How can I tell if my HVAC ductwork is the main cause of uneven temperatures?
If some rooms are hotter or colder consistently, your ductwork may have leaks, blockages, or poor layout disrupting proper airflow.
Is it worth upgrading my ductwork if I’m also replacing my HVAC system?
Yes, new ductwork improves airflow and efficiency, ensuring your upgraded HVAC system performs at full capacity without energy loss.
What signs suggest my duct insulation is no longer effective?
If ducts feel warm to the touch or condensation forms, your insulation may be damaged, thin, or poorly installed.
How long does a full HVAC ductwork repair usually take?
Most residential duct repairs take one to three days, depending on accessibility, damage, and the complexity of your system layout.
Can damaged ductwork affect indoor air quality and allergies?
Yes, gaps or leaks in ducts can pull dust, pollen, and mold into your system, worsening allergies and respiratory issues.